NexMobility iOS developers India have intended many apps and today, they will share their experience of developing alarm clock app with iOS app development community worldwide. This app works well and sets one alarm at a time. You can follow the below instructions and steps to get an ideal working alarm clock application.
In this tutorial we will develop alarm clock application to set one alarm at a time.
Create new Single View Application project and name it SingleAlarm.
IndidFinishLaunchingWithOptions method in AppDelegate.m class registerUIUserNotificationSetting or UIRemoteNotificationType according to the iOS running in your device. This is shown in below screen shot.

Open ViewController.hfile; declare three properties with IBOutlets likely UILabel titled lblAlarm, UIDatePicker titled dataPicker and UISwitch titled switchAlarm. Declare a method scheduleLocalNotificationWithDate, their use we will see later in brief way. Please check below screen shot for more understanding.

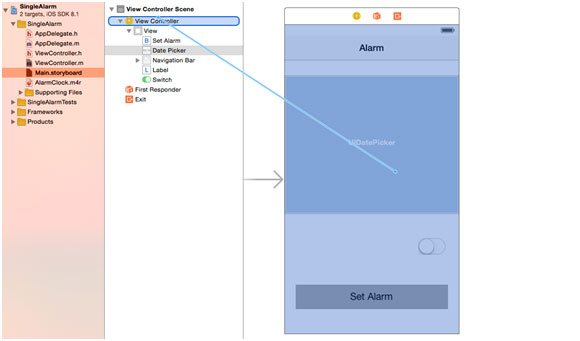
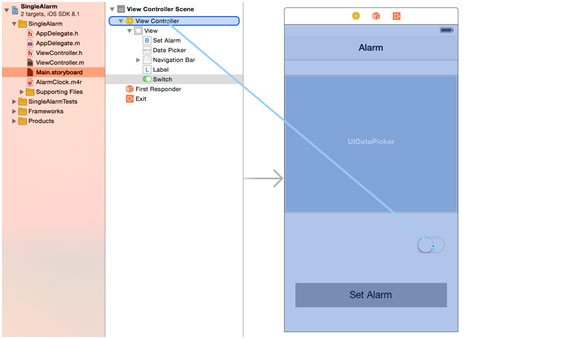
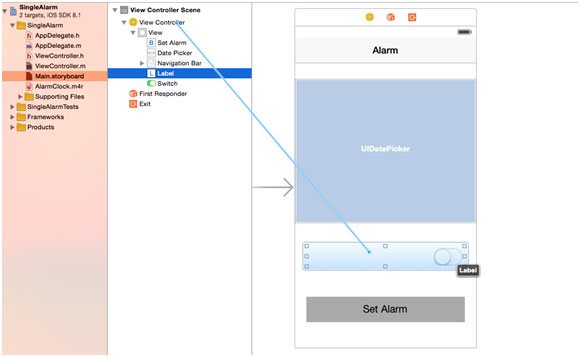
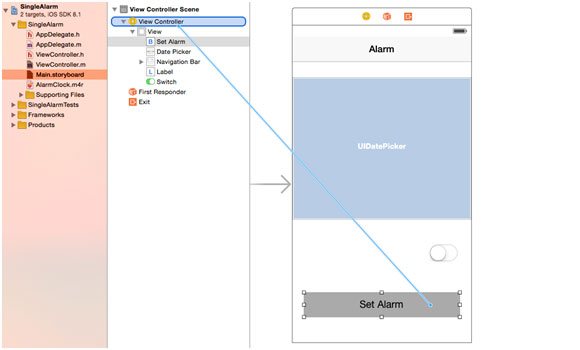
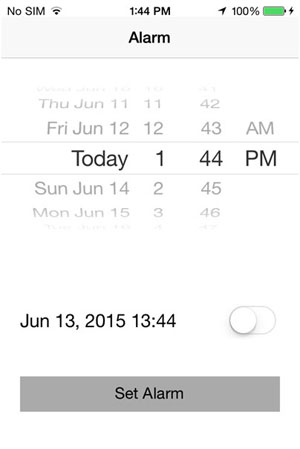
In Main.storyboardfile add UIDatePicker and one UIButton titled Set Alarm into view. Now add one UILabel to show date and time whatever we will set using date picker. Add one UISwitch to makes scheduled alarm ON or OFF. Connect UI objects to respective IBOutlet and IBActions as we described above. Check below screen shots for more understandings.
OpenViewController.m class and create an instance variable of already declared properties in ViewController.h class using synthesize. In viewDidLoad method firstly we will check for any alarm has been already scheduled or not; to check this we have used NSUserDefaults which we used to store fire date of alarm. So now what we have to do is populate date picker by setting current date and time using [NSDatedate] if there are no any scheduled alarm other than populate the stored date into date picker. Create a date formatter to display date and time into Alarm label, which we took earlier as lblAlarm. Check below screen shot for more understandings.

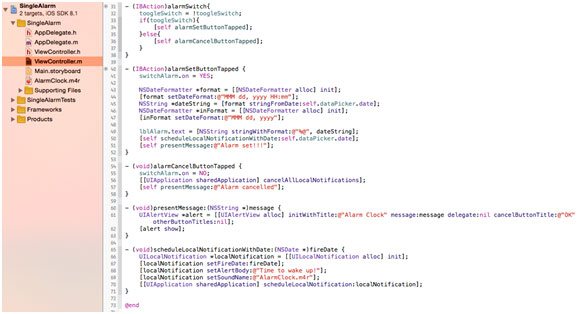
Now we will implement a method to toggle alarm state either you want to keep alarm ON or OFF. Let’s give this method name alarmSwitch and in this method we have implemented logic to schedule or cancel alarm using the methods alarmSetButtonTapped and alarmCancelButtonTapped respectively
We have implemented method declared as alarm SetButtonTapped, which will be triggered when
- User will tap on Set Alarm button located at bottom centre and
- User will activate alarm by switching alarm to ON state.
In this method we simply getting time from DatePicker and setting alarm by scheduling a UILocalNotification through scheduleLocalNotificationWithDatemethod that you can see coded at last into below screenshot. The use of scheduleLocalNotificationWithDatemethod is to schedule a notification by setting a fire date and to store the same date and time into device memory through NSUserDefaults.
We have also used another properties of UILocalNotification to display message and play a sound when scheduled notification will invoke. To do such things we have used notification properties like setAlertBody: to display alarm message and setSoundName: (Here we used sound clip AlramClock.m4r that we have already copied into project bundle) to ring up a sound on alarm execution.
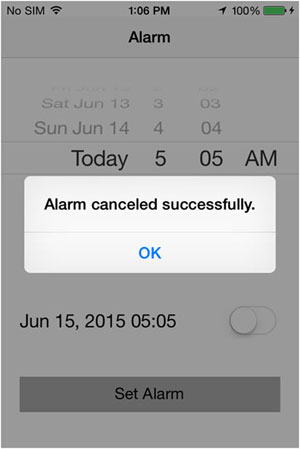
We have created alarmCancelButtonTapped to cancel out the scheduled alarm and to remove the scheduler date from device memory. This method will be triggered when user toggle alarm switch from ON state to OFF state.
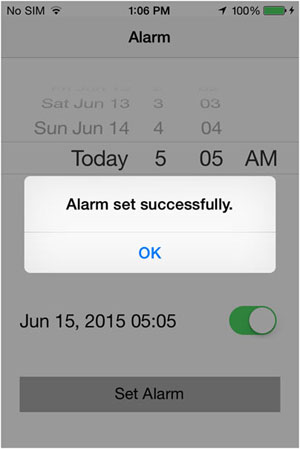
In present Messagemethod is used to give prompt to user when new alarm will be scheduled or cancelled out.
That’s it! You’re now ready to test your application. Just hit the Run button. If everything is correct your application should run properly.
NexMobility team of iOS developers India has shared their experience with you. If you have any doubt or query related to iOS app development, contact customer support to get in touch with professionals. Your feedback matters!
