In this tutorial, iphone app developers will tell you how to create Sidebar view (Menu view) using third party library. They are using SWRevealViewController library created by John Lluch. Let’s get started to learn how the things get done.
We will learn how to create Sidebar view (Menu view) or a Navigation Drawer like in Android using third party library named SWRevealViewController a wonderful creation by John Lluch. You can use this tutorial easily for two or more view controller. Start with creating a “Single View Application” project with the name “SidebarMenuView”. Download and extract the zipped file for SWRevealViewController, add SWRevealViewController.h and SWRevealViewController.m to our project in library folder.
Create three new Cocoa Touch Class and name it MenuViewController, MapViewController, PhotoViewController and add to project.
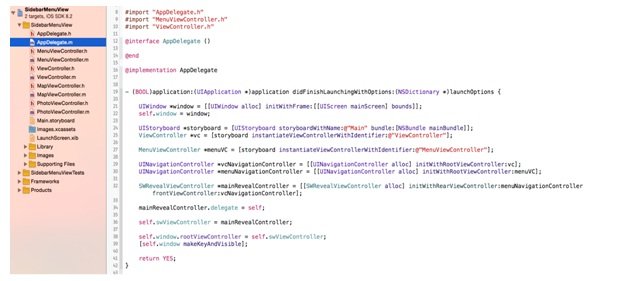
Import SWRevealViewController.h in Appdelegate.h class and set SWRevealViewControllerDelegate. For setting property of UIWindow and SWRevealViewController check below screenshot.

Open Appdelegate.m file than import MenuView.h and ViewController.h files and go to the didFinishLaunchingWithOptions method and set RearViewController as a MenuViewController and frontViewController as a Viewcontroller for instant of SWRevealViewController as shown in below screenshot.
Open main storyboard and add navigation controller with storyboard entry point. Add view controller from object library and set class as “MenuViewController” in identity inspector section. Here MenuViewController set as a rootViewController. Check below screenshot for more details.
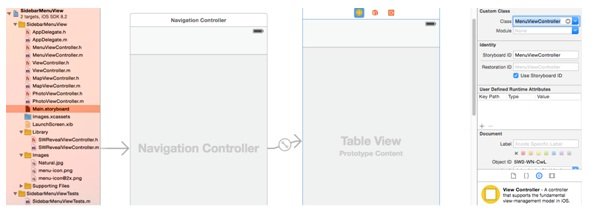
Follow same process ViewController, MapViewConreoller and PhotoViewController.
Add UITablewView to MenuViewController and set delegate and datasource after add one UILabel for ViewController and set name as “Home View”. Add MapKit View to the MapViewController and add ImageViewController to the PhotoViewController. Here you can set any image that you want to show. For more info please check below screenshots.
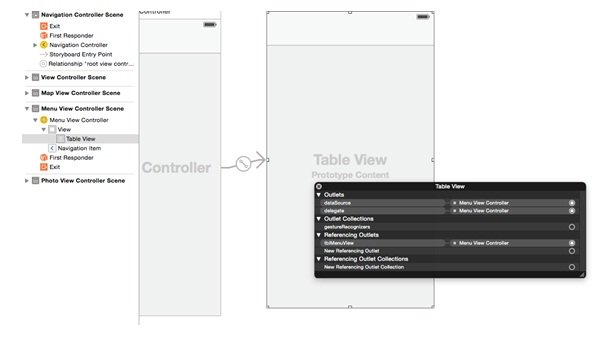
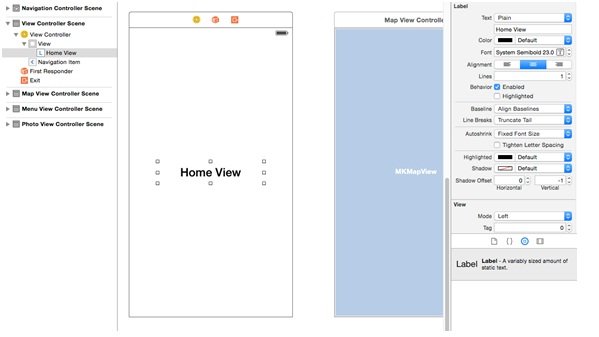
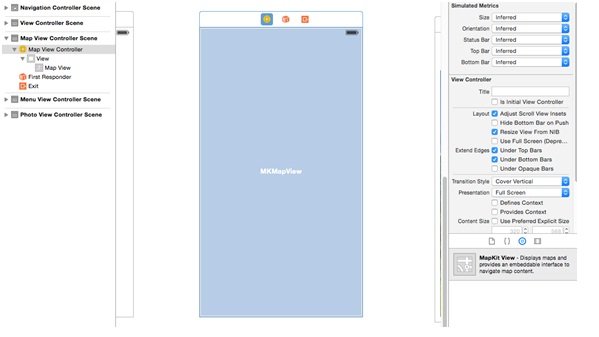
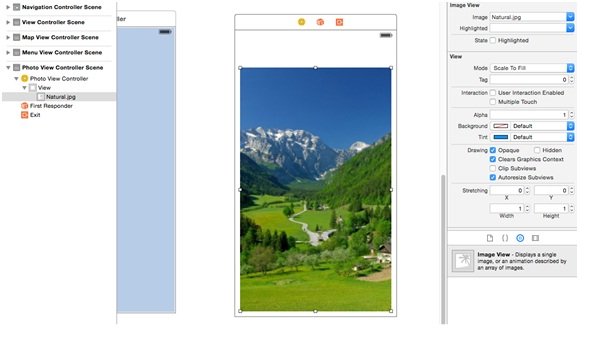
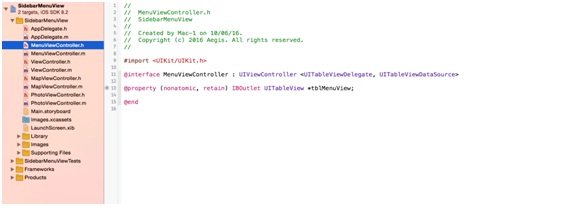
Open MenuViewController.h file and set UITableViewDelegate and UITableViewDataSource. Add one IBOutlets of type UITableView and set connection in storyboard. Please check below screenshot.
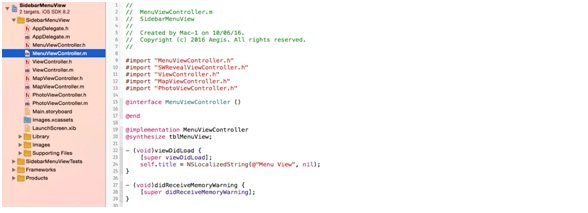
Open MenuViewController.m file and import SWRevealViewController.h, ViewController.h, MapViewController.h and PhotoViewController.h files. In viewDidLoad methods set title as “Menu View”. Here you can set any title you want. Please check below screenshot.
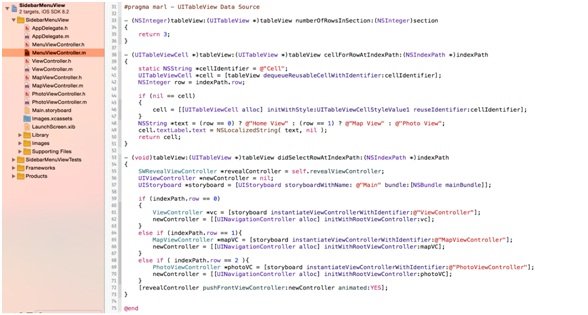
Now set table view delegate methods. In the numberOfRowInSection set 3 because in this example we have three controller.
Next cellForAtIndexPath set row title as per the row number than didSelectRowAtIndexPath method create instant of SWRevealViewController and use for pushViewController also init all three view controller with rootViewController using storyboard. This all things are shown in below screenshot.
There is no change to be done in ViewController.h file. Open the ViewController.m file and import SWRevealViewController.h file.
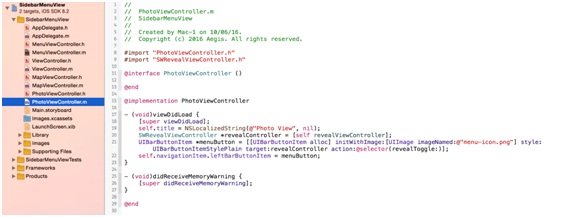
In the viewDidLoad method set title of view controller and create instant of SWRevealViewController and call revealViewController method. Set left bar button with image of menu. Same process to be followed for the MapViewController.m and PhotoViewController.m. Check below screenshots for more information.


That’s it! You’re now ready to test your app. Just hit “Run” button. If everything is correct, your app should run properly in the Simulator or device and you get the below output with slide out menu.

Hope iPhone app developers have made you understood about using third party library to create Sidebar view. For any doubts, contact professionals. You can learn more about third party libraries online. Read the articles related to third party libraries and understand the concept.


